

Meteor 是什么?
官方文档是这样描述 Meteor[1] 的:Meteor 是一个用于开发 Web 和移动端应用的全栈 JavaScript 平台。它包含一系列用于实现客户端实时响应的技术和与之配合的一个构建工具,以及来自 Node.js 和常规 JavaScript 社区的精选软件包。
简而言之,用户可以便捷的使用 Meteor 平台搭建一套从前端到移动端再到后端的全栈实时响应式系统,且具有以下优点:
-
用户在前端、移动端和后端等不同开发环境中可以仅使用 JavaScript 一种语言 进行开发。
-
Meteor 中由后端主动传送数据给前端渲染,而不是等前端 HTML 发起请求,称之为 数据连接线。
-
Meteor 关注 JavaScript 生态系统, 为用户带来 JavaScript 活跃社区中最佳的部分。
-
Meteor 提供 全栈式的响应支持, 使得用户用最小的开发代价让页面反应真实的数据。
GitHub 链接:
https://github.com/meteor/meteor
快速上手
Meteor 支持 MacOS、Windows 和 Linux[2] 平台。
Windows上,首先安装 Chocolatey[3],然后使用管理员权限运行以下命令:
choco install meteor
MacOS 或 Linux 平台直接从终端中安装 Meteor 最新发布版本:
curl https://install.meteor.com/ | sh
由于网络问题,国内安装时请注意启用代理
Windows 安装程序支持 Win 7,Win 8.1,Windows Server 2008 和 Windows Server2012。命令行安装程序支持 MacOS 10.7(Lion)及更高版本,以及 x86 和 x86_64 体系结构上的 Linux。
Meteor 安装好后创建一个项目:
meteor create try-meteor
本地运行:
cd try-meteor
meteor
# Meteor server running on: http://localhost:3000/
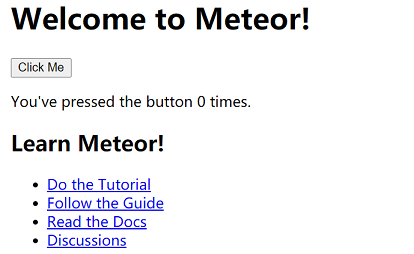
项目默认启动3000端口,如果3000端口被占用,可以通过添加 --port <指定的端口> 参数进行配置,成功运行后截图如下:
项目目录如下:
client/main.js        # 浏览器端JS脚本
client/main.html      # 初始化HTML
client/main.css       # 初始化CSS
server/main.js        # 服务端启动脚本
test/main.js          # 测试脚本
package.json          # npm包管理
package-lock.json     # npm依赖描述
node_modules/         # node_modules
.meteor/              # meteor内部架构文件
.gitignore            # .gitignore
前端比较简单,这里好奇一下 Meteor 后端的启动代码,打开后发现及其简洁:
import { Meteor } from 'meteor/meteor';

Meteor.startup(() => {
  // code to run on server at startup
});
可以看到 Meteor 针对后端启动代码进行了全方位的封装,使用起来非常简单,具体封装这里不详细展开,有兴趣可以查看 官方网站[4] 和 Meteor github开源代码[5] 。
下面我们尝试通过 Meteor 创建一个简单的 Todo 项目 simple-todos ,从项目中入门 Meteor 的使用。
Todo 项目入门体验
创建项目
首先按照 快速上手 中命令创建项目 simple-todos:
meteor create simple-todos

cd simple-todos
meteor
修改前端展示模板
首先, 从 HTML 入口文件中移除掉初始化项目代码 (仅留下 <head> 标签):
<!-- client/main.html  -->

<head>
  <title>simple-todos</title>
</head>
在 simple-todos 目录中创建 imports 文件夹,然后在 imports 中创建多个文件,如下:
<!-- imports/ui/body.html  -->

<body>
    <div class="container">
      <header>
        <h1>Todo List</h1>
      </header>

      <ul>
        {{#each tasks}}
          {{> task}}
        {{/each}}
      </ul>
    </div>
  </body>

  <template name="task">
    <li>{{text}}</li>
  </template>
// imports/ui/body.js

import { Template } from 'meteor/templating';

import './body.html';

Template.body.helpers({
  tasks: [
    { text: 'This is task 1' },
    { text: 'This is task 2' },
    { text: 'This is task 3' },
  ],
});
在前端的 JavaScript 入口文件 client/main.js 中, 移除所有代码并且引用 imports/ui/body.js:
// client/main.js

import '../imports/ui/body.js';
import 的工作原理和项目代码组织可以参考官网 项目结构组织[6] .
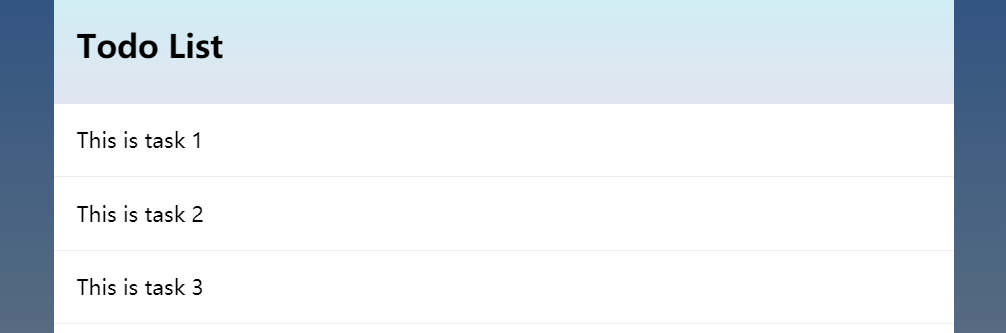
此时,我们浏览器中的展示就变成了:
Todo List
This is task 1 This is task 2 This is task 3
接下来我们了解一下上面代码都做了什么:
HTML 模板渲染
Meteor 在转化 HTML 文件时会识别三个标签: <head>, <body>, 和 <template>.
所有 <head> 和 <body> 标签中的内容都会被分别添加到 HTML 页面的 head 和 body 部分。
所有 <template> 标签中的内容会被编译为 Meteor 模板, 在 HTML 中能通过 {{> templateName}} 进行引用,在 JavaScript 文件中通过 Template.templateName 进行引用。
同样的,JavaScript 中能通过 Template.body 引用 HTML 的 body 部分,把它当作一个父模块,可以包含其他子模板.
给 HTML 模板添加逻辑代码
HTML 文件中所有的代码都会被 Spacebars 编译器[7] 进行编译。Spacebars 允许你能通过双重大括号括起来的语句对视图添加逻辑代码或数据,如 {{#each}} 和 {{#if}} 。
可以通过定义 helpers 从 JavaScript 代码中传递数据给前端页面。在上述代码中, 在 Template.body 中定义了一个 tasks 的 helper, 这个 helper 返回一个数组。在 HTML 的 body 标签中, 我们可以使用 {{#each tasks}} 遍历数组,对每一个值添加 task 模板。在每个 tash 模板中, 可以通过 {{text}} 展示每个数组项的 text 属性。
CSS 样式渲染
为了更好的体验,建议在项目中复制粘贴下面的样式代码:
/* client/main.css */

body {
  font-family: sans-serif;
  background-color: #315481;
  background-image: linear-gradient(to bottom, #315481, #918e82 100%);
  background-attachment: fixed;

  position: absolute;
  top: 0;
  bottom: 0;
  left: 0;
  right: 0;

  padding: 0;
  margin: 0;

  font-size: 14px;
}

.container {
  max-width: 600px;
  margin: 0 auto;
  min-height: 100%;
  background: white;
}

header {
  background: #d2edf4;
  background-image: linear-gradient(to bottom, #d0edf5, #e1e5f0 100%);
  padding: 20px 15px 15px 15px;
  position: relative;
}

#login-buttons {
  display: block;
}

h1 {
  font-size: 1.5em;
  margin: 0;
  margin-bottom: 10px;
  display: inline-block;
  margin-right: 1em;
}

form {
  margin-top: 10px;
  margin-bottom: -10px;
  position: relative;
}

.new-task input {
  box-sizing: border-box;
  padding: 10px 0;
  background: transparent;
  border: none;
  width: 100%;
  padding-right: 80px;
  font-size: 1em;
}

.new-task input:focus{
  outline: 0;
}

ul {
  margin: 0;
  padding: 0;
  background: white;
}

.delete {
  float: right;
  font-weight: bold;
  background: none;
  font-size: 1em;
  border: none;
  position: relative;
}

li {
  position: relative;
  list-style: none;
  padding: 15px;
  border-bottom: #eee solid 1px;
}

li .text {
  margin-left: 10px;
}

li.checked {
  color: #888;
}

li.checked .text {
  text-decoration: line-through;
}

li.private {
  background: #eee;
  border-color: #ddd;
}

header .hide-completed {
  float: right;
}

.toggle-private {
  margin-left: 5px;
}

@media (max-width: 600px) {
  li {
    padding: 12px 15px;
  }

  .search {
    width: 150px;
    clear: both;
  }

  .new-task input {
    padding-bottom: 5px;
  }
}
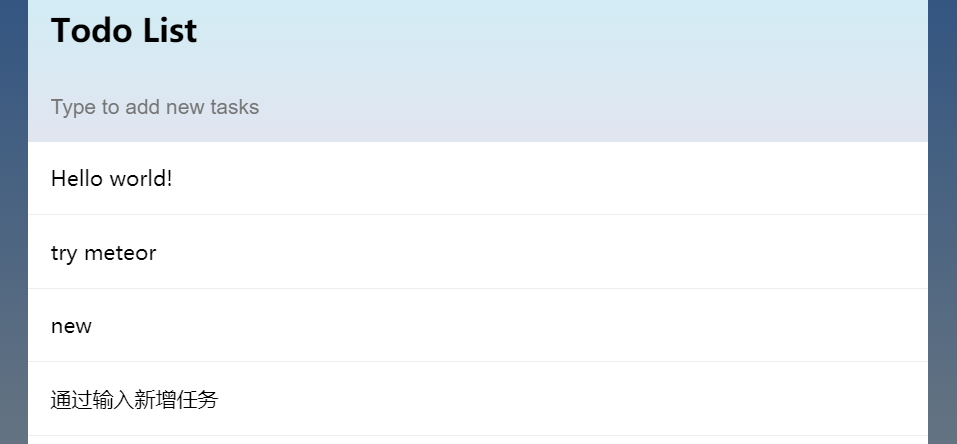
样式修改后如图:
下一步, 我们将会使用 helpers 让模板页面展示来自数据库集合中的数据。
集合
集合是一个特殊的数据结构,它将你的数据存储到 MongoDB 数据库中。集合前后端都可以访问到,且可以自动更新,因此每一个连接的用户浏览器都能进行实时地同步。
JavaScript 中调用 new Mongo.Collection("my-collection") 可以轻松的创建一个集合。这条代码在服务端的 MongoDB 中创建了一个 my-collection 集合,与此同时在客户端创建了一个连接服务端的缓存。
定义一个新的 imports/api/tasks.js 模块, 这个模块创建了一个 Mongo 集合并且导出:
// imports/api/tasks.js

import { Mongo } from 'meteor/mongo';

export const Tasks = new Mongo.Collection('tasks');
注意新文件放在 imports/api 目录下。这个目录主要用于存储项目中 API 相关的文件。除了放集合文件,还可以添加 “publications” 读取文件和 “methods” 写入集合文件。相关请参考 项目组织结构[8] 。
在 server/main.js 引用 imports/api/tasks.js :
// server/main.js

import '../imports/api/tasks.js';
接下来修改客户端 JavaScript 文件,改为从服务端集合中获取任务,替代原来的数组。
// imports/ui/body.js

import { Template } from 'meteor/templating';

import { Tasks } from '../api/tasks.js';

import './body.html';

Template.body.helpers({
    tasks() {
        return Tasks.find({});
      },
});
代码修改后页面之前显示的任务列表为空,这是因为目前数据库中还未存入任何数据。
从服务端控制台添加任务
集合里的数据项被称为文档(documents)。新建一个终端程序,切换到项目根目录下,输入:
meteor mongo
然后输入:
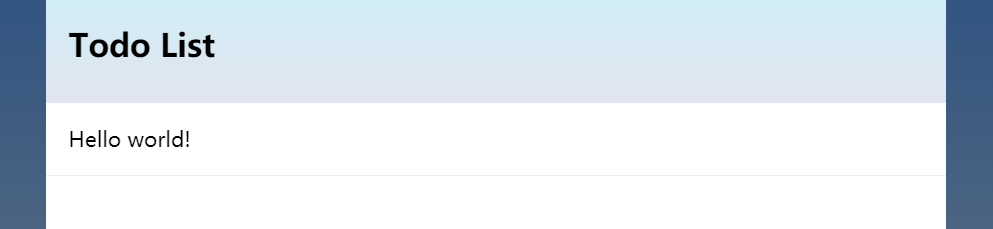
db.tasks.insert({ text: "Hello world!", createdAt: new Date() });
浏览器中页面立即展示出了你新建的任务。可以看到不需要在服务端或前端写其他任何连接代码,一切自动完成。
可以尝试通过终端新增几条任务,接下来尝试通过函数创建任务而不是终端手动输入。
通过表单添加任务
首先在 HTML 中添加表单:
<!-- imports/ui/body.html  -->

<div class="container">
 <header>
  <h1>Todo List</h1>

  <form class="new-task">
   <input type="text" name="text" placeholder="Type to add new tasks" />
  </form>

 </header>

 <ul>
  {{#each tasks}}
   {{> task}}
  {{/each}}
 </ul>
</div>
</body>

<template name="task">
 <li>{{text}}</li>
</template>
JavaScript 中监听 submit 事件:
// imports/ui/body.js

<template name="task">
 <li>{{text}}</li>
</template>

// 新增代码
Template.body.events({
 'submit .new-task'(event) {
  // 阻止浏览器自动提交
  event.preventDefault();

  // 从元素中获取值
  const target = event.target;
  const text = target.text.value;

  // 像集合中插入任务
  Tasks.insert({
   text,
   createdAt: new Date(), // current time
  });

  // 输入完成后清除表单
  target.text.value = '';
 },
});
在浏览器上打开一个新的客户端窗口,在其中一个输入任务,你会发现所有客户端都同时更新。
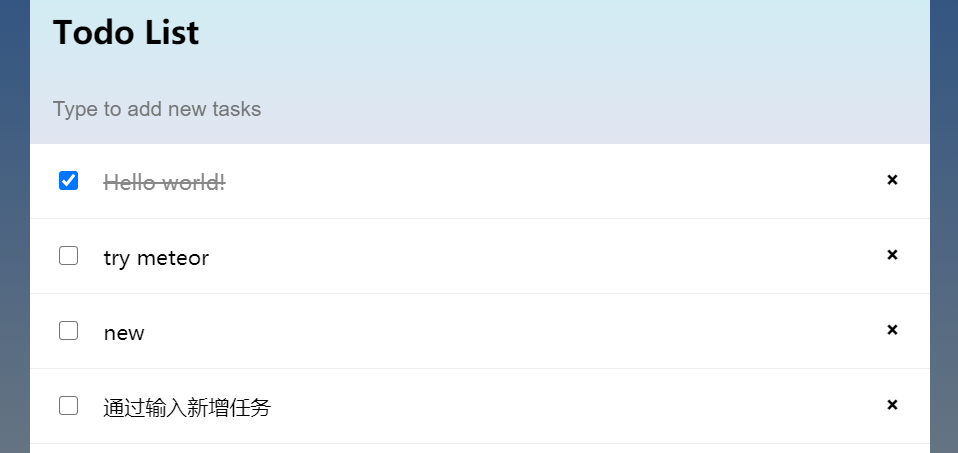
点击删除任务
修改 task 模板,新建一个 checkbox 和删除按钮。
<!-- imports/ui/task.html -->
<template name="task">
<li class="{{#if checked}}checked{{/if}}">
<button class="delete">×</button>
<input type="checkbox" checked="{{checked}}" class="toggle-checked" />
<span class="text">{{text}}</span>
</li>
</template>
删除之前的 task 模板:打开 imports/ui/body.html,删掉 <template name="task">...</template> 部分。
在新增的页面元素中添加监听事件:
// imports/ui/task.js

import { Template } from 'meteor/templating';

import { Tasks } from '../api/tasks.js';

import './task.html';

Template.task.events({
  'click .toggle-checked'() {
    // 取 checkbox 相反值
    Tasks.update(this._id, {
      $set: { checked: ! this.checked },
    });
  },
  'click .delete'() {
    Tasks.remove(this._id);
  },
});
同样的,body 模板中也需要更新:
// imports/ui/body.js

import { Tasks } from '../api/tasks.js';

import './task.js';
import './body.html';
上述修改后,点击就可以完成修改或删除事件。
在安卓或 iOS 上运行
Meteor 目前还不支持 windows 构建移动端,windows 用户可以跳过,由于生产环境限制文章无法提供截图,请自行尝试。
在 iOS 模拟器上运行
在项目根目录运行:
meteor install-sdk ios
完成后运行:
meteor add-platform ios
meteor run ios
完成后会发现 iOS 模拟器上就能弹出应用。
在安卓模拟器上运行
在根目录输入:
meteor install-sdk android
然后输入:
meteor add-platform android
同意所有的 license 声明,然后输入
meteor run android
完成后安卓端也能顺利运行。
Meteor 学习资源
以上为 Meteor 简单入门体验,如果需要深入了解 Meteor 特性,可以参考以下资源。
-
官方入门指导[9] 。
-
官方推荐通过 Stack Overflow[10] 提出技术性问题,注意带上 meteor 标签。
-
访问 Meteor 论坛[11] 。
-
Meteor 核心 API 文档 Meteor docs[12] .
-
Atmosphere[13] ,Meteor 的非官方代码包库。
-
Awesome Meteor[14] 是社区总结的一系列 包[15] 和 资源[16].
参考资料
Meteor: https://www.meteor.com/
[2]
MacOS、Windows 和 Linux: https://www.meteor.com/install
[3]
Chocolatey: https://chocolatey.org/
[4]
官方网站: https://www.meteor.com/
[5]
Meteor github开源代码: https://github.com/meteor/meteor
[6]
项目结构组织: http://guide.meteor.com/structure.html
[7]
Spacebars 编译器: http://blazejs.org/api/spacebars.html
[8]
项目组织结构: http://guide.meteor.com/structure.html
[9]
官方入门指导: https://www.meteor.com/tutorials/blaze/creating-an-app
[10]
Stack Overflow: http://stackoverflow.com/questions/tagged/meteor
[11]
Meteor 论坛: https://forums.meteor.com
[12]
Meteor docs: https://docs.meteor.com
[13]
Atmosphere: https://atmospherejs.com
[14]
Awesome Meteor: https://github.com/Urigo/awesome-meteor
[15]
包: https://github.com/Urigo/awesome-meteor#getting-started
[16]
资源: https://github.com/Urigo/awesome-meteor#resources


- 随机文章
标签云集
-
css
mysql优化
树莓派
webpack
golang小技巧
设计教程
分布式
大数据可视化
python插件
docker命令
移动端识别
zabbix
Java
ui设计
php
swoole
docker小技巧
前端技术
docker的使用
javascript
react
jupyter
前端开发
iphone x
MySQL小知识
交互设计
docker
linux
设计灵感
nginx
PHP小技巧
APP UI设计
数据库
logo
k8s
vue
ios
adobe
网页设计
android
mysql
electron开发
图标设计
app设计
APP设计参考
JavaScript小技巧
vue小技巧
Redis
页面设计
python


